


Dated dresser turned hip and modern.
When we moved into our second house, we lacked storage for all of our underwear, socks, scarves, belts, etc. in our bedroom... big time. We desperately needed a dresser. The problem however, was that my hubby, for some odd reason, does not like dressers. What? Who doesn't like dressers where everything is neatly organized, in a drawer, and easily accessible? After some discussion, it turned out that it was not the furniture piece he was opposed to but rather the typical dresser style; we were not allowed to have a tall, big drawer unit with legs. So I went looking for something totally opposite.
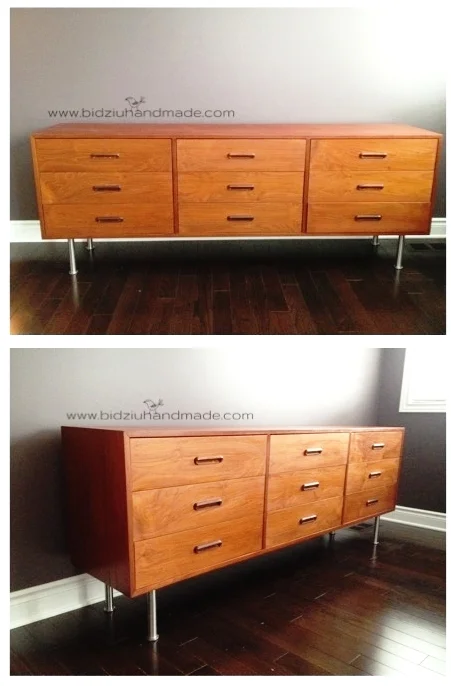
My search took me to kijiji, where I found a second hand, solid teak credenza (as it was described) that met all of my hubby's criteria. It was low, had smaller drawers, and it had a lot of potential for becoming a hip and modern piece of furniture.
To update this piece, I first sanded the entire dresser and drawer fronts. Then, I primed and painted just the outside of the dresser in a gloss white paint. The sanding on the drawer fronts revealed a more pale, cooler shade of brown, which I really liked. It went perfectly with the white and instantly the dresser looked much more modern so I didn't do anything more. Originally I planned on installing chrome hardware on the drawers, but we actually really liked the look of the wood pulls so we left them on untouched.

To solve the issue of legs, I simply removed them and we attached the dresser to the wall using L-brackets. To maintain a low profile, we attached it just a few inches above the baseboard.

Dresser attached to the wall via L-brackets. L-brackets were attached in each corner and in the centre of the unit on the inside of the unit, and also underneath the dresser.
This was probably one of the easiest furniture makeovers I have ever done! But what a difference between the original and the final result! I just love it! Not only because it's a much more discreet solution to housing our undergarments than the wire baskets, but it truly looks like a million bucks! It's modern, sleek, and husband approved!


